Rails tutorial
Covered in this doc
- Cloning an example application with Percy already integrated
- Making some changes and reviewing them in Percy
The tutorial assumes you have ruby, git, and phantomjs installed.
Step 1: Clone the example app:
$ git clone https://github.com/percy/example-rails.git
$ cd example-rails
Step 2: Sign in to Percy, create a new organization, and create a new project. You can name both the organization and project 'todo'.
After you've created the project, you'll be shown a token environment variable.
Step 3: In the shell window you're working in, export the token environment variable:
# Windows
$ set PERCY_TOKEN=<your token here>

# Unix
$ export PERCY_TOKEN=<your token here>
Note: Usually this would only be set up in your CI environment, but to keep things simple we'll configure it in your shell so that Percy is enabled in your local environment.
Step 4: Install the example app's dependencies and database:
$ bundle install && bundle exec rake db:create && bundle exec rake db:migrate
$ npm install
Note: If you are required install chromedriver install it using brew on Mac.
brew cask install chromedriver
Step 5: Run the following rake task to take snapshots and upload them to Percy:
$ bundle exec rake snapshots
This will run the test suite and upload DOM snapshots for Percy to render screenshots. Percy will use the token you used in Step 3 to know which organization and project to send renderings to.
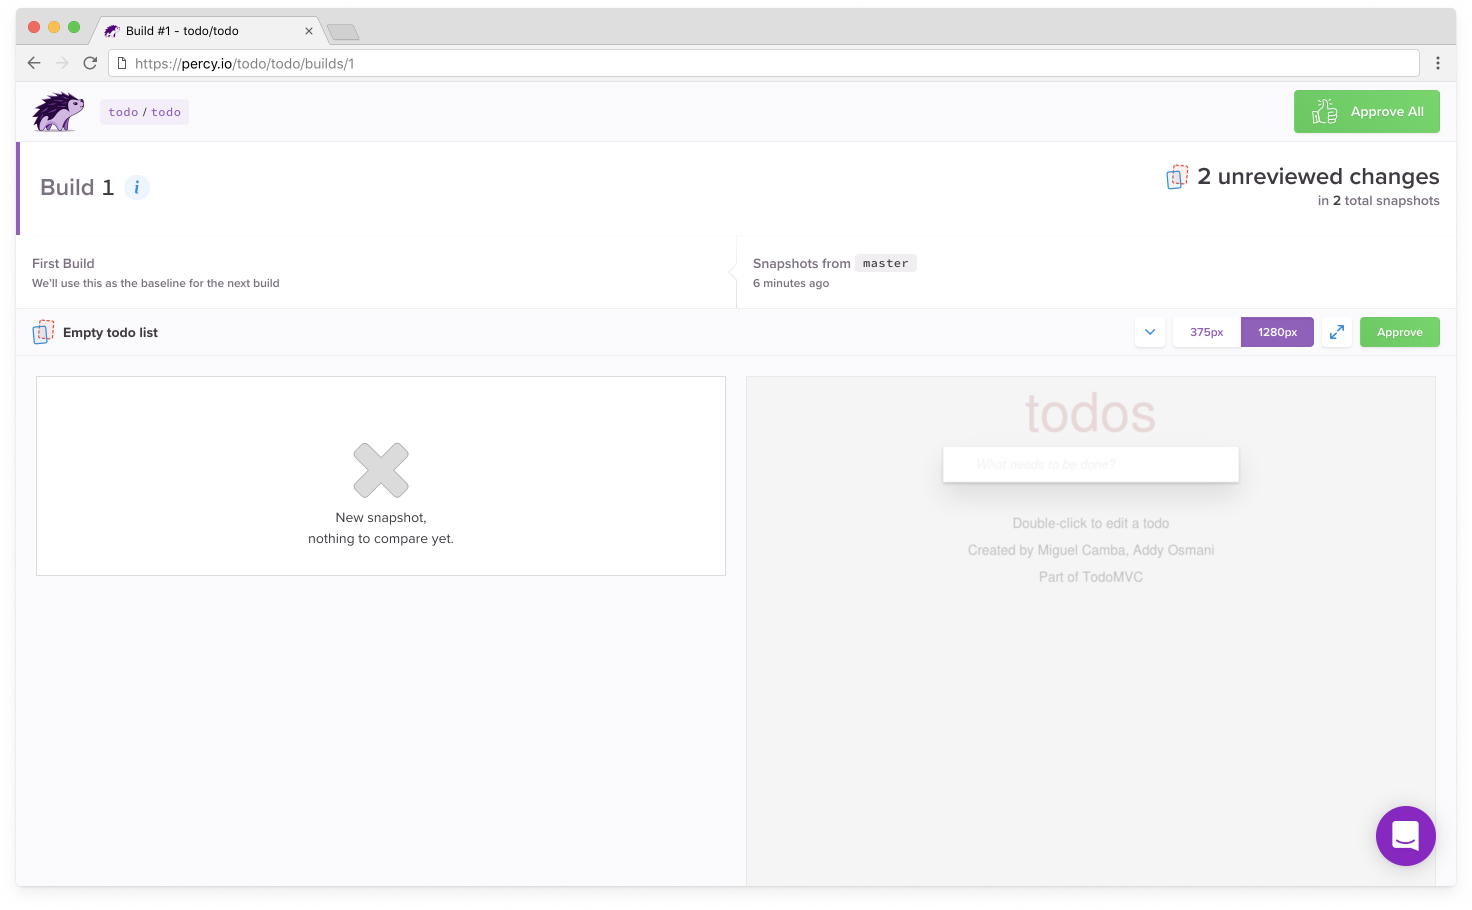
You can view the screenshots in Percy, but there will be no visual comparisons yet since it is your first build.

Step 6: Use your text editor to edit app/assets/stylesheets/application.css and change the #new-todo background-color from #ffffff to #f5f5f5.
Step 7: Also edit app/views/layouts/application.html and edit the footer to add a new paragraph on line 22: <p>Now tested with Percy</p>
Step 8: Commit the change:
$ git add . && git commit -m "Changed background color and updated footer."
Step 9: Run the tests again:
$ bundle exec rake test
This will take snapshots of our modified application, render new screenshots to compare against previously rendered screenshots, and detect visual changes between the two.
At the end of the run output, you will see logs from Percy confirming that the screenshots were successfully rendered and giving you a direct URL to check out the visual changes.
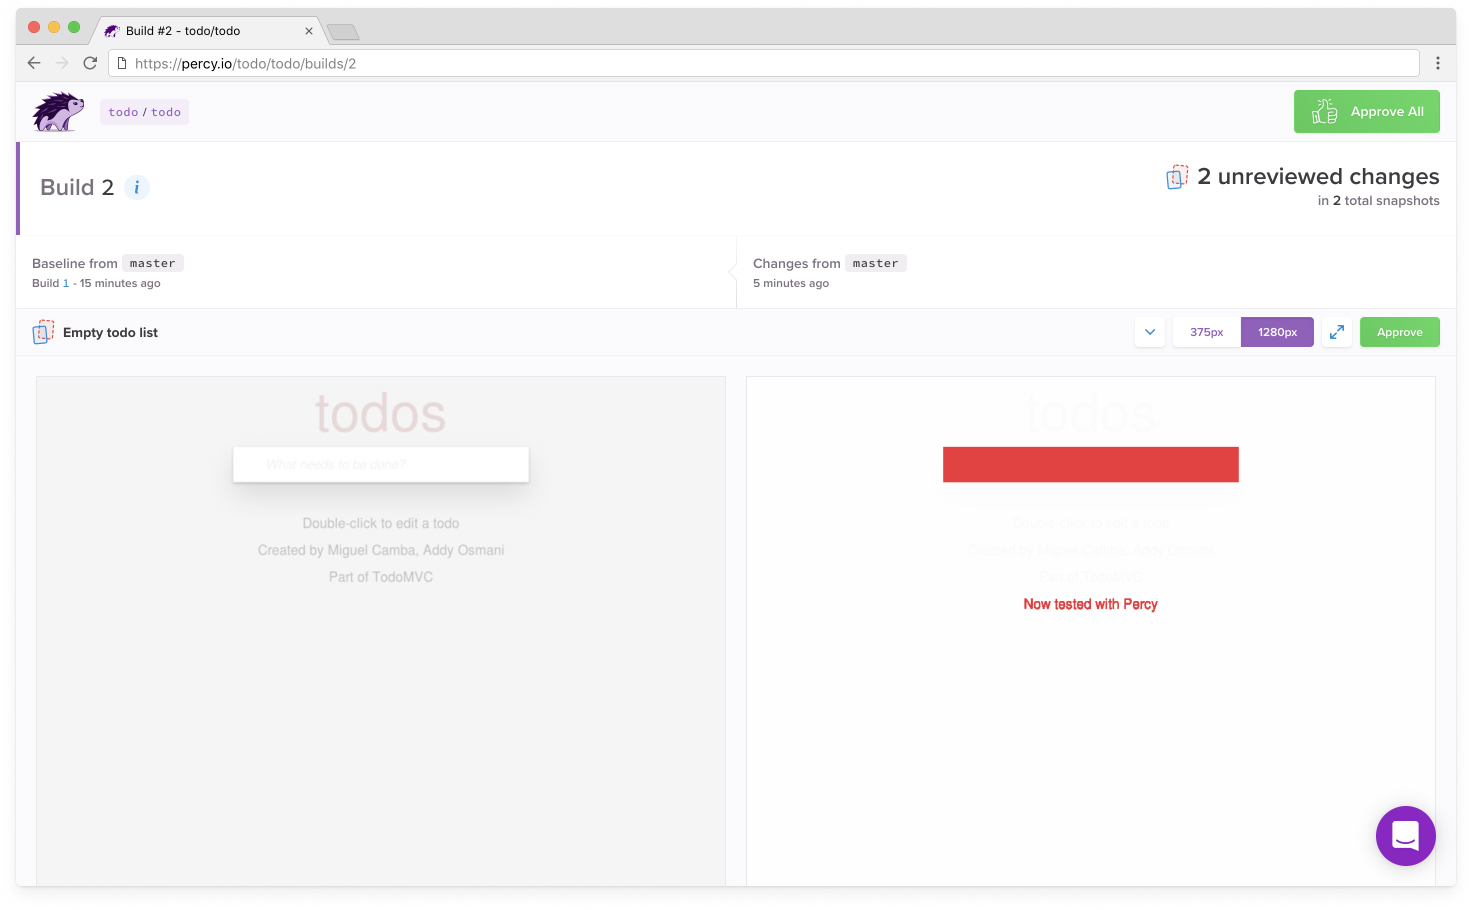
Step 10: Visit your project in Percy and you'll see a new build with the visual comparisons between the two runs. Click anywhere on the Build 2 row. Individual screenshots are grouped into snapshots for each page. By default, Percy renders screenshots at 375px and 1280, and across both Firefox and Chrome. You can see the baseline snapshots on the left, and the new snapshots on the right.
Percy has highlighted what's changed visually in the app! Snapshots with the largest changes are shown first You can click on the highlight to reveal the underlying screenshot.

If you scroll down, you'll see that no other snapshots were affected by our changes to the 'Clear completed' button. The unchanged snapshots appear grouped together at the bottom of the list.
Finished! 😀
From here, you can try making your own changes to the app if you like. If you do re-run the tests, and then you'll see your changes reflected in Percy.
Updated about 2 years ago
Check out the example app on GitHub, and learn how to add Percy to your own Rails app with our Capybara SDK!